
How to Extract Data from Intelligent Office (IO)
We’ve pulled together a quick “how-to” for Intelligent Office users on how to get the data we need to get set up on Eligible.
Step 1
Create a new MI Report . Then select ‘Client and Plan’ as Data Source:

Select folder category as ‘mortgage’ from the drop down list.
Step 2
Select ‘Plan.Plan Category’ as the only one.

Step 3
Under Actions select ‘organise outputs’. This is where you select all the mortgage product information headings you want in your spreadsheet, ie all the categories you need.
You will still need to add any client contact information. Make sure to use the ( . ) when searching – see below. Select these items:
- In Force Date
- Mortgage – Completion Date
- Mortgage – Feature Expires
- Mortgage – Interest Rate
- Mortgage – Loan Amount
- Mortgage – Price/Valuation
- Mortgage – Redemption End Date
- Mortgage – Repayment Method
- Mortgage – Rev Rate
- Mortgage – Review Diary Date
- Mortgage – SchemeEndDate
- Mortgage – Term (months)
- Mortgage – Term (years)
- Mortgage Address Line 1
- Mortgage Address Line 2
- Mortgage Address Line 3
- Mortgage City / Town
- Mortgage Postcode
- Owner 1.Client Reference
- Owner 1.Date of Birth
- Owner 1.Email Address
- Owner 1.Full Name
- Owner 1.Home Telephone Number
- Owner 1.Mobile Number
- Owner 1.Work Telephone Number
- Owner 2.Client Reference
- Owner 2.Date of Birth
- Owner 2.Email Address
- Owner 2.Full Name
- Owner 2.Home Telephone Number
- Owner 2.Mobile Number
- Owner 2.Work Telephone Number
- Plan Advice Type
- Plan Status
- Plan Type
- Policy Number
- Policy Start Date
- Product Name
- Provider.Name
- Selling Adviser.Full Name
- Selling Adviser.Email Address
- Submitted Date
- Value of Property
- Mortgage - Interest Only Amount
- Mortgage - Capital Repayment Amount
- Mortgage – Rate Type
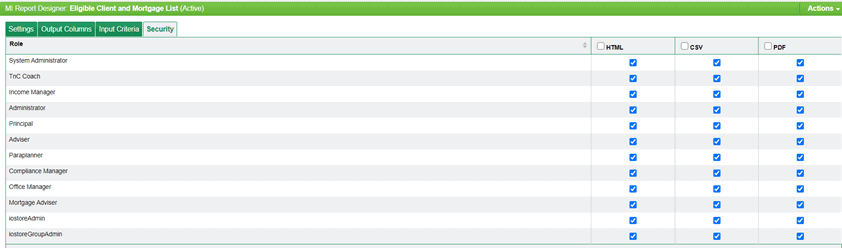
Step 4
Next, make sure correct permission in place to run the report within the security tab. Make sure you have all tick boxes in all columns ticked, see below.
That’s it.
Step 5
Run the report. This screen may appear and appear as if the report hasn't worked. Just click CSV export. That will then pull in to Excel, and off you go…

I need help
We’re happy to jump on a call and screen share with you, just send us an email or talk to us on live chat.